[PHP]画像ファイルのアップロードとGDを使ったリサイズ

GD を使って画像のリサイズを行う場合は imagecopyresampled() を使うのですが、PNG や GIF などで透過情報を保つ場合は工夫が必要です。
そこでアップロードされた画像を指定したサイズに収まるようにリサイズする関数を作ってみました。

<?php
function uploadImage($tmpName, $dir, $maxWidth, $maxHeight){

    $finfo = new finfo(FILEINFO_MIME_TYPE);
    $mime = $finfo->file($tmpName);

    if($mime == 'image/jpeg' || $mime == 'image/pjpeg'){
        $ext = '.jpg';
        $image1 = imagecreatefromjpeg($tmpName);
    } elseif($mime == 'image/png' || $mime == 'image/x-png'){
        $ext = '.png';
        $image1 = imagecreatefrompng($tmpName);
    } elseif($mime == 'image/gif'){
        $ext = '.gif';
        $image1 = imagecreatefromgif($tmpName);
    } else {
        return false;
    }
    
    list($width1, $height1) = getimagesize($tmpName);

    if($width1 <= $maxWidth && $height1 <= $maxHeight){
        $scale = 1.0;
    } else {
        $scale = min($maxWidth / $width1, $maxHeight / $height1);
    }

    $width2 = $width1 * $scale;
    $height2 = $height1 * $scale;

    $image2 = imagecreatetruecolor($width2, $height2);

    if($ext == '.gif'){
        $transparent1 = imagecolortransparent($image1);
        if($transparent1 >= 0){
            $index = imagecolorsforindex($image1, $transparent1);
            $transparent2 = imagecolorallocate($image2, $index['red'], $index['green'], $index['blue']);
            imagefill($image2, 0, 0, $transparent2);
            imagecolortransparent($image2, $transparent2);
        }
    } elseif($ext == '.png'){
        imagealphablending($image2, false);
        $transparent = imagecolorallocatealpha($image2, 0, 0, 0, 127);
        imagefill($image2, 0, 0, $transparent);
        imagesavealpha($image2, true);
    }

    imagecopyresampled($image2, $image1, 0, 0, 0, 0, $width2, $height2, $width1, $height1);

    if(!file_exists($dir)){
        mkdir($dir, 0777, true);
    }

    $filename = sha1(microtime() . $_SERVER['REMOTE_ADDR'] . $tmpName) . $ext;
    $saveTo = rtrim($dir, '/\\') . '/' . $filename;

    if($ext == '.jpg'){
        $quality = 80;
        imagejpeg($image2, $saveTo, $quality);
    } else if($ext == '.png'){
        imagepng($image2, $saveTo);
    } else if($ext == '.gif'){
        imagegif($image2, $saveTo);
    }

    imagedestroy($image1);
    imagedestroy($image2);

    return $saveTo;
}

if($_SERVER["REQUEST_METHOD"] === 'POST'
    && !empty($_FILES['image']['tmp_name']))
{
    $now = new DateTime();

    $maxWidth = 300;    // 最大幅
    $maxHeight = 300;   // 最大高さ

    // 一時ファイルの場所
    $tmpName = $_FILES['image']['tmp_name'];

    // 保存先のディレクトリ
    $dir = __DIR__ . '/files/' . $now->format('Y/m/d');
    $path = uploadImage($tmpName, $dir, $maxWidth, $maxHeight);
    var_dump($path);
    exit;
}
?>
<!DOCTYPE html>
<html>
    <head>
        <meta charset="utf-8">
        <title>image</title>
    </head>
    <body>
        <form method="POST" enctype="multipart/form-data">
            <input type="file" name="image">
            <input type="submit" value="submit">
        </form> 
    </body>
</html>

リサイズに成功すると保存先のファイルパスを返します。失敗した場合は false を返します。
拡張子偽装の可能性を考慮して finfo で MIME type を調べるようにしています。

[PHP]GDでアンチエイリアスのかかった綺麗な楕円を描く

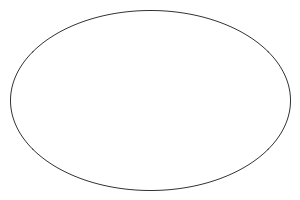
PHP で正円・楕円を描画する場合、通常は GD の imageellipse() で描くことになるのですが、imageantialias() を使ってもアンチエイリアスがかからないため、ジャギーのあるギザギザした線になってしまいます。

アンチエイリアスのかかった直線を描くアルゴリズムの一つに Xiaolin Wu Line Algorithm というものがあり、そちらを応用する形で楕円を描くという手法を用いるとかなり綺麗な円を描くことができます。

wu_ellipsewu_ellipse2

様々な方法による円の描画を比較した記事 Drawing Antialiased Circles and Ellipses (by Stephan Brumme) を参考に imageellipse() と同じ使い方ができるように関数化してみました。

<?php
function wu_ellipse($image, $cx, $cy, $width, $height, $color){
	$rx = $width / 2;
	$ry = $height / 2;
	$rx2 = $rx * $rx;
	$ry2 = $ry * $ry;
	
	$quarter = round($rx2 / sqrt($rx2 + $ry2));
	for ($x = 0; $x <= $quarter; $x++)
	{
		$y = $ry * sqrt(1 - $x*$x / $rx2);
		$error = $y - floor($y);
		$transparency = round($error * 0x7F);
		$alpha  = $color | ($transparency << 24);
		$alpha2 = $color | ((0x7F - $transparency) << 24);
		plot4points($image, $cx, $cy, $x, floor($y),   $alpha);
		plot4points($image, $cx, $cy, $x, floor($y)+1, $alpha2);
	}
	
	$quarter = round($ry2 / sqrt($rx2 + $ry2));
	for ($y = 0; $y <= $quarter; $y++)
	{
		$x = $rx * sqrt(1 - $y*$y / $ry2);
		$error = $x - floor($x);
		$transparency = round($error * 0x7F);
		$alpha  = $color | ($transparency << 24);
		$alpha2 = $color | ((0x7F - $transparency) << 24);
		plot4points($image, $cx, $cy, floor($x),   $y, $alpha);
		plot4points($image, $cx, $cy, floor($x)+1, $y, $alpha2);
	}
}

function plot4points($image, $cx, $cy, $dx, $dy, $color)
{
	imagesetpixel($image, $cx + $dx, $cy + $dy, $color);
	imagesetpixel($image, $cx - $dx, $cy + $dy, $color);
	imagesetpixel($image, $cx + $dx, $cy - $dy, $color);
	imagesetpixel($image, $cx - $dx, $cy - $dy, $color);
}


$image = imagecreatetruecolor(300, 300);
$color = imagecolorallocate($image, 0x33, 0x33, 0x33);
$bg = imagecolorallocate($image, 0xFF, 0xFF, 0xFF);
imagefill ($image, 0, 0, $bg);

$width  = 240;
$height = 240;
$cx = 150;
$cy = 150;

wu_ellipse($image, $cx, $cy, $width, $height, $color);

header("Content-type: image/png");
imagepng($image);

【参考】
Fast, Antialiased Circles and Ellipses from Xiaolin Wu’s concepts
Drawing Antialiased Circles and Ellipses

[PHP]GDで作った画像をファイル化せずに直接<img>タグで表示する

html の <img> タグは src 属性にファイル名を指定するのが通常ですが、
Data URI スキームを利用することで画像データを html そのものに埋め込むことが出来ます。

書式は「data:MIMEタイプ;base64,データの内容」です。
画像そのものを html ソースに記述するためソース内には大量の文字の羅列がうめつくされることになります。
また、Safari, Chrome, FireFox などの主要ブラウザでは正しく表示されますが、IE に関しては IE8 以上でないと表示されない上、IE8 ではファイルサイズの上限が 32KB までとなっているため注意が必要です。

<?php
$img = imagecreatetruecolor(100, 100);

$color1 = imagecolorallocate($img, 30, 50, 170);
$color2 = imagecolorallocate($img, 255, 255, 255);
$color3 = imagecolorallocate($img, 230, 0, 0);

imagefill($img, 0, 0, $color2);

imagefilledellipse($img, 50, 50, 90, 90, $color1);
imagefilledellipse($img, 50, 50, 60, 60, $color2);
imagefilledellipse($img, 50, 50, 30, 30, $color3);

ob_start();
imagejpeg($img, null, 90);
$content = base64_encode(ob_get_contents());
ob_end_clean();
imagedestroy($img);
?><!DOCTYPE html>
<html lang="ja">
<head>
<meta charset="utf-8">
<title></title>
</head>
<body>

<img src="data:image/jpeg;base64,<?php echo $content;?>" alt="sample" />

</body>
</html>

roundel

HTML ソース


<!DOCTYPE html>
<html lang="ja">
<head>
<meta charset="utf-8">
<title></title>
</head>
<body>

<img src="data:image/jpeg;base64,/9j/4AAQSkZJRg(中略)AKKKKAP/Z" alt="sample" />

</body>
</html>

参考
http://ja.wikipedia.org/wiki/Data_URI_scheme