Javascript と html5 の canvas を組み合わせてリアルタイムで動作するアナログ時計を作ってみました。
おまけですが PHP と GD を使ったバージョンも合わせて掲載しています。
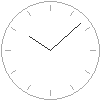
動作サンプル
Html5 + Javascript + canvas
<!DOCTYPE html>
<html>
<head>
<meta charset="UTF-8">
<title>Clock</title>

<script type="text/javascript">
<!--
window.onload = function()
{
	var width   = 100;
	var height  = 100;
	var centerX = Math.floor(width / 2);
	var centerY = Math.floor(height / 2);
	var canvas  = document.getElementById('clock');
	var context = canvas.getContext('2d');

	setInterval(drawClock, 1000);
	drawClock();

    function drawClock() {

		var date   = new Date();
		var hour   = date.getHours();
		var minute = date.getMinutes();
		var second = date.getSeconds();


		// 色の指定
		context.strokeStyle = '#666666';

		context.clearRect(0, 0, canvas.width, canvas.height);

		// 文字盤の描画
		context.beginPath();
		context.arc(centerX, centerY, centerX - 1, 0, Math.PI*2, false);
		context.stroke();

		context.save();
		context.translate(width/2, height/2);
		for(var i=0;i < 360; i+= 30){
			context.rotate( 30 * Math.PI / 180);
			context.beginPath();
			context.moveTo(0, centerY * 0.8);
			context.lineTo(0, centerY * 0.9);
			context.stroke();
		}
		context.translate(-width/2, -height/2);
		context.restore();

		context.strokeStyle = '#333333';

		drawHand(centerY * 0.5, hour * 30 + minute / 60 * 30);
		drawHand(centerY * 0.8, minute * 6 + second / 60 * 6);

		context.strokeStyle = '#EE0000';

		drawHand(centerY * 0.8, second * 6);
	}

	// 針の描画
	function drawHand(length, angle){
		context.save();
		context.translate(centerX, centerY);
		context.rotate( angle * Math.PI / 180);
		context.beginPath();
		context.moveTo(0, 0);
		context.lineTo(0, -length);
		context.stroke();
		context.restore();
	}
}
//-->
</script>

</head>
<body>
<canvas id="clock"></canvas>
</body>
</html>
rotate() だけでは回転軸を指定して回転させる事ができないので、translate() を使って画像全体をずらし、回転させた後で元の位置に戻すことで回転の中心を変えています。
PHP + GD
PHP の imagedrawellipse() と imagedrawline() の組み合わせでも一応作れます。
こちらはリアルタイム動作ではありません。また、サーバー側のリソースを消費するので使い道はあまり無いかもしれません。
<?php
date_default_timezone_set('Asia/Tokyo');

$date   = new DateTime();
$hour   = (int)$date->format("h");
$minute = (int)$date->format("i");

$width  = 100;
$height = 100;

$centerX = floor($width / 2);
$centerY = floor($height / 2);

$img       = imagecreatetruecolor($width, $height);
$handColor = imagecolorallocate($img, 0x33, 0x33, 0x33);
$dialColor = imagecolorallocate($img, 0xAA, 0xAA, 0xAA);
$bg        = imagecolorallocate($img, 0xFF, 0xFF, 0xFF);

imagefill($img, 0, 0, $bg);
imagecolortransparent($img, $bg);

// 文字盤の描画
imageellipse($img, $centerX, $centerY, $width - 1, $width -1, $dialColor);

for($i=0;$i < 360;$i+=30){
	list($x1, $y1) = point_rotate($centerX * 0.8, $i);
	list($x2, $y2) = point_rotate($centerX * 0.9, $i);
	imageline($img, $x1 + $centerX, $y1 + $centerY, $x2 + $centerX, $y2 + $centerY, $dialColor);
}

// 針の描画
$hour = $hour % 12;
list($hourX, $hourY) = point_rotate($centerX * 0.5, $hour * 30 + $minute / 2);
imageline($img, $centerX, $centerY, $hourX + $centerX, $hourY + $centerY, $handColor);
list($minuteX, $minuteY) = point_rotate($centerX * 0.8, $minute * 6);
imageline($img, $centerX, $centerY, $minuteX + $centerX, $minuteY + $centerY, $handColor);

header("Content-type:image/png");
imagepng($img);
imagedestroy($img);


function point_rotate($r, $degree){
  $radian = deg2rad($degree - 90);
  $x = round($r * cos($radian));
  $y = round($r * sin($radian));
  return array($x, $y);
}